Mastering the WordPress dashboard is the first thing you must learn after launching a WordPress-powered blog or website. This is basically your control panel – you will use your dashboard to tweak your site, create content, access statistics, and monitor comments. It’s the first thing you see when you log in, so getting the hang of all the widgets and dashboard menus is a must for every beginner out there. Even better, you can learn how to customize the WordPress dashboard so that it meets all your needs and ensures a smoother admin experience.

The WordPress dashboard is basically the backend of your website. Initially, your dashboard is a collection of gadgets that provide plenty of useful information at a glance. This is very convenient since you don’t have to navigate through multiple pages to learn more about your website. You can see when visitors post new comments, get the latest WordPress news, and create a new post quickly. Once you customize the WordPress dashboard to your exact needs, you will save yourself plenty of time. That’s why it’s important to learn more about what’s included in the dashboard and how to optimize it to better serve your purposes.
If you’re a beginner, navigating your dashboard can seem confusing at first. Luckily, the WordPress dashboard has evolved into a highly flexible platform with every new WordPress update. In other words, you can tweak it so that it provides a big-picture view of the main components of your site. We have a quick guide that will help you familiarise yourself with the backend of your site. Plus, you also get a few easy tips on how to customise the WordPress dashboard based on personal preference.
What’s included in the WordPress dashboard?
The WordPress dashboard is basically a collection of different widgets. You can enable or disable these widgets based on what you want to see after you log in. To do this, you need to click on the Screen Options drop down menu you can see at the top of the page. You’ll access a list of all available widgets. Uncheck the ones you want to remove and check the additional ones you want to see.
Sounds simple enough, right? And yet, many WordPress beginners skip this step because they don’t know it’s possible to customise this area based on their particular needs. Moreover, WordPress also allows you to minimise widgets or drag them to a new location with ease. Thus, you can place widgets you use more frequently to a location that’s more accessible for you.
Now that the basics are out of our way, let’s see what default widgets populate your WordPress dashboard. It will help you figure out which ones will be useful and which ones you could live without.
Welcome to WordPress!
Once you install WordPress, this welcome widget will appear at the top of the dashboard. It’s a collection of useful links you need to get started. This widget is beneficial mainly for beginners. That’s why you can’t minimise it, but you can choose to completely dismiss it. However, if you’re just getting started, you might want to keep it around for a bit.
On the left side, you have a big Customize button, as well as a link that will redirect you to the main themes area. The middle column contains quick links that allow you to create a blog post/page, and view your website. The right column gives lets you access the widgets page, manage comments, and learn more about getting started with WordPress. If you already dismissed the Welcome to WordPress widget by mistake, you can always re-enable it via the Screen Options drop down menu.
At a Glance
This is a great widget since it allows you to quickly assess your website metrics. It’s meant to give you a general overview of your web page and shows you the total number of posts, pages, and comments (including spam). You can see the name of your theme as well.
Quick Draft
This widget comes in handy when you’re looking to write down ideas for future articles. It’s only a basic editor, so you won’t be able to customize your post. You can’t upload an image or format your text, but you can jot down your title and a few ideas for your post when you’re short on time. You can always come back later and complete/format the article.
Activity
The Activity widget allows you to see our last published posts and latest comments. You can use the widget to reply to comments, trash them or move them to spam – hence saving precious time. Pretty convenient.
WordPress News
This widget keeps you up-to-date on everything WordPress. It displays the latest official WordPress blogs, so you can keep it enabled if you’re looking to learn more about the content management system. However, if you’re not a big WordPress buff, you should hide it and clear up space for other widgets that may be more useful for you.
These are the basic widgets that come pre-packaged with WordPress. However, your dashboard isn’t restricted to these five widgets alone. For instance, many plugins add a widget to your dashboard after activating it. You can also add your own custom widgets to your dashboard, although that requires some technical knowledge. Not to worry, we’re here to lend a helping hand. Read on.
Enhancing the WordPress Dashboard: A Step-by-Step Guide
We already covered the simplest way to customize the WordPress dashboard: using the Screen Options drop-down menu. From there, you can choose the widgets you want to show on the dashboard in just a few clicks. It’s the quickest and simplest way to keep the dashboard clean and fast. Once you settle on the gadgets you want to see, rearrange them by drag-and-dropping them around your screen. If you’re running WordPress version 3.8 or higher, your admin panel is responsive so depending on the size of your display you will see different numbers of available columns for your widgets. Pretty simple.
Looking for even more customization? Using the Screen Options menu isn’t the only way to go. You can also use plugins to customize the WordPress dashboard or alter the functions.php file to better suit your needs. Here’s a closer look at these two options.
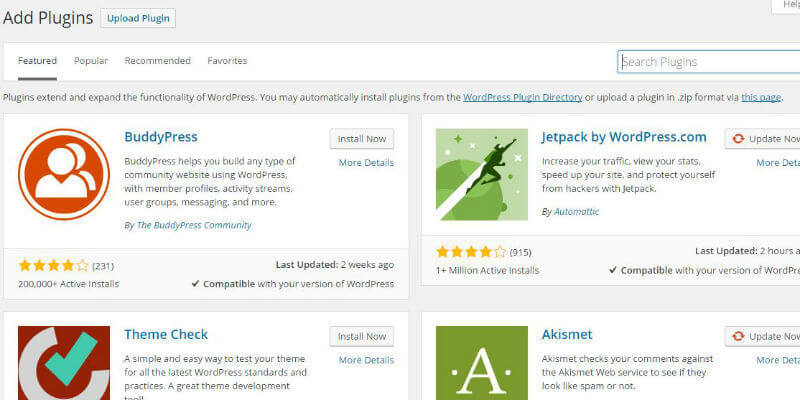
Customize the WordPress dashboard using plugins
One of the best things about WordPress is that it’s easy to personalize it via plugins. When it comes to enhancing your dashboard, there are several plugins available that will make your admin life easier. We’ve gathered a short list of the most popular and useful ones. Use them to customize the WordPress dashboard and enjoy a more pleasant admin experience.
1) WP Hide Dashboard
The WP Hide Dashboard plugin really cleans things up. It removes the dashboard and Screen Options sections, as well as the Help button on the Profile page from your subscribers when they log in. If you’re running WordPress for multiple users, this will definitely come in handy. Plus, it’s easy to use: you just install it, no configuration necessary. Another similar plugin is Remove Dashboard Access, which limits dashboard access to admins only.
2) Adminize
If you manage a multi-author WordPress blog or WordPress site, this is another plugin you might want to consider when looking to customize the WordPress dashboard. Admins can use it to activate/deactivate every part of the menu and even parts of the sub-menu for editors/contributors.
If you’re easily bored, you might want to spice up your dashboard by modifying dashboard colors. You can start by visiting Users – Your Profile page. If none of the available colors satisfy you, this plugin offers you access to extra admin color schemes, so you can truly customize the WordPress dashboard based on your preferences.
This plugin allows you to manually edit the dashboard menu. You can reorder the menus, show/hide specific items, change permissions, and so on. You can even create custom menus that point to any part of the dashboard or an external URL.
This plugin is particularly useful for admins who want to notify users with backend access about something important, or even set reminders for themselves. It allows you to choose the color of the notifications, whether or not to include a logo, and exactly what pages to include the note. Pretty cool.
6) WP-Hotkeys
If you’re a fan of keyboard shortcuts, this is the plugin for you. It allows you to add keyboard shortcuts and can navigate throughout the backend area of your site by using solely the keyboard.
Customize the WordPress dashboard using functions.php
Even with access to WordPress’ Screen Options menu and the plugins listed above, you might want to take your WordPress dashboard customization even further. Good news: you can use your theme’s functions.php file to make just about anything happen. It’s just a matter of adding a few lines of code. To access functions.php go to Appearance – Editor.
Remove dashboard widgets
You can use functions.php to disable default dashboard widgets without installing any additional plugins. Simply use the code found in the WordPress Codex; you basically don’t need any prior coding knowledge to pull this off. Just add this to your functions.php file:
https://gist.github.com/cristianraiber/5cbd8203152bfa6f8f9febc1a8ddc268
Please note that the code above will remove ALL your dashboard widgets.
Create your own dashboard widget
WordPress makes it easy for users to create custom widgets. You need to use two functions to do the job. The first one contains the content of the custom widget, while the second turns the output of the first function into a widget. The code should look something like this:
https://gist.github.com/cristianraiber/7b65373d6625c54fa39f2f7f90b6afa6
Customize the order of the Admin Menu
The following snippet of code will allow you to reorganise the order of elements in the admin menu, so they will appear in an order that better fits your needs:
https://gist.github.com/cristianraiber/4480ab0208999c820b3e468e2c0b28c6
Pro Tip: Wplift has a great list of code snippets you can use to control the WordPress admin area. You should definitely check it out.
Make the WordPress dashboard accessible for the client
All the tips listed above will make the user’s life easier. If you’re the only one with access to the backend of your site it’s natural to want to personalise it based on your preferences. If multiple users can log in to the Dashboard, it’s best to customize it so they can only access the areas that interest them. This prevents subscribers from gaining access to restricted areas only the admin should be able to control.
This applies especially if your clients aren’t WordPress savvy. When that’s the case, making things as simple as possible for them should be job number one. Besides limiting access to the dashboard and adjusting screen options, there are a few more things you can try to provide a smoother WordPress experience.
1) Create your very own Getting Started guide
[wp-pic slug=”wp-help” layout=”large” scheme=”scheme1″margin=”0 0 0 0″ containerid=”download-sexion” ajax=”yes”]
When you’re working with clients who are particularly unfamiliar with WordPress, a good idea is to use the WP Help plugin to create a personalized Getting Started guide. The guide will be viewable in the WordPress admin and you can customize it based on each client’s particular needs. There’s no limit to what you can include in your guide, so start by thinking about the most frequent questions your clients ask and take it from there. A comprehensive Getting Started guide makes things easier for the client and helps you significantly limit support time.
2) Adjust the interface with WP Admin UI Customize
[wp-pic slug=”wp-admin-ui-customize” layout=”large” scheme=”scheme1″margin=”0 0 0 0″ containerid=”download-sexion” ajax=”yes”]
Similar to the Admin Menu Editor plugin we talked about above, WP Admin UI Customize allows you to customize the WordPress dashboard and adjust the way a given user sees it without modifying the code. What’s great is that it does so with the help of a handy visual interface that makes it easy to disable certain blocks from the dashboard, tweak the sidebar, or modify notification settings.
3) Install a brand new admin theme
When you’re working with clients, going the extra mile is often a must. And when you’re in the business of developing WordPress sites for them, the quickest way to stand out from the crowd is to install an admin theme. Not only will you completely rebrand the backend, offering clients a more pleasant experience, but you can also simplify the admin area and make it easier for them to use. Bonus: admin themes actually come as plugins, not themes, so they’re insanely easy to implement.
Pro Tip: You can find a great list of brilliant admin themes here.
The dashboard can easily become a nuisance when it’s filled with useless widgets, most of them showing up after you install a new plugin. Taking control of the dashboard can turn it from mundane annoyance into powerful tool. It can become your client’s go-to place to write down ideas, reply to comments, and check statistics.
Conclusion
Learn how to customize the WordPress dashboard to make your admin life more pleasant in the long run. WordPress provides you with all the tools you need to tweak the admin area to better serve your interests. We hope our quick tutorial helps you get a head start. Keep browsing our blog for useful WordPress tips and don’t forget to subscribe to the newsletter!